Creating your own curtains can be a rewarding project that adds a personal touch to your home decor. Whether you want to match your curtains to the specific colours of your room or choose a fabric that complements your style, making custom curtains can transform your space. This guide from Aussie Home Improvement will walk you through the entire process of creating curtains from scratch, using a variety of materials and methods. We’ll also answer some frequently asked questions about curtains, blinds, and custom-made options to help you make informed decisions.
Why Make Your Own Curtains?
Before we dive into the details, let’s discuss the benefits of creating your own curtains.
- Personalisation: Custom-made curtains allow you to select your preferred fabric, colour, and design to match the overall theme of your room.
- Cost-Effective: While ready-made curtains can be expensive, making your own can save you money. With a little effort and some sewing skills, you can get the same high-end look for less.
- Unique Designs: Create one-of-a-kind curtains that no one else will have, giving your home a distinctive touch.
- Perfect Fit: Custom-made curtains ensure that your window is covered perfectly, without any awkward gaps or ill-fitting panels.
Materials You Will Need
Creating curtains from scratch is not only about fabric; it’s also about having the right tools and materials. Here’s a list of everything you’ll need:
- Fabric: Choose a fabric that suits your room’s decor and the function of your curtains. Lighter fabrics work well for airy spaces, while heavier materials like velvet or linen are great for adding warmth and a touch of elegance.
- Curtain Lining: This is optional, but linings help with insulation, light-blocking, and providing a more finished look.
- Curtain Tape or Heading Tape: This is used for creating pleats or gathering the fabric at the top of the curtain.
- Measuring Tape: Accurate measurements are crucial to ensure your curtains fit your windows perfectly.
- Scissors: A sharp pair of fabric scissors will make cutting the fabric easier and cleaner.
- Sewing Machine: While it’s possible to sew curtains by hand, using a sewing machine will save you time and make the process smoother.
- Pins and Iron: These are essential for holding your fabric in place and ensuring your seams are crisp.
- Curtain Rod: Depending on the style of curtains you choose, the curtain rod may also be part of your project.
Step-by-Step Guide on How to Create Curtains
Step 1: Measure Your Windows
Before purchasing fabric or getting started with the sewing process, measuring your window accurately is crucial. Here’s how:
- Measure the width of the window from one side to the other.
- Measure the length from the top of the window frame to where you want the curtain to fall (usually just above the floor or to the windowsill).
- For full window coverage, you’ll want your curtains to be approximately 1.5 to 2 times the width of the window. This will allow for some fullness and pleating.
Tip: Don’t forget to factor in the hem when calculating your fabric needs. Add extra for the top and bottom of your curtains for a clean finish.
Step 2: Choose Your Fabric
The fabric you choose will set the tone of your room. Light fabrics like cotton, linen, and sheer materials work well in sunny, bright spaces. Heavier fabrics like velvet, brocade, and canvas are ideal for creating a more formal, luxurious look or for rooms needing extra warmth and privacy.
Tip: If you’re unsure, consider creating a fabric swatch book to test your choices in the actual room. Natural light can make the colours appear different than they do in-store.
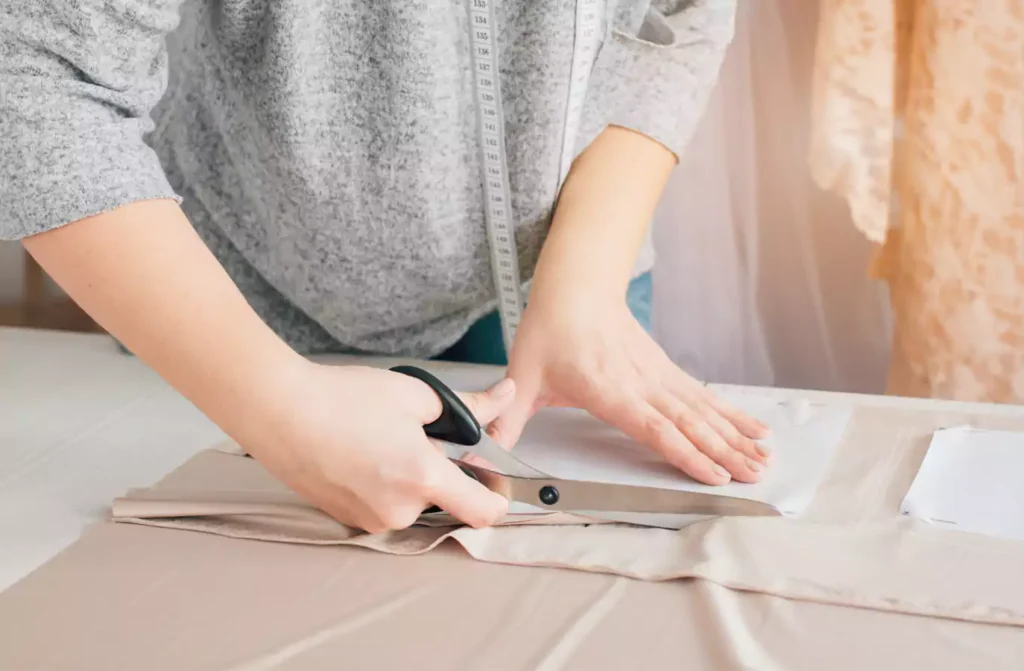
Step 3: Cutting the Fabric
Once you have your measurements and fabric, it’s time to cut your material. Be sure to:
- Cut the fabric according to the length and width measurements, adding at least 5cm for hems and seams.
- If you’re making pleated curtains, ensure you have enough fabric to gather, or use curtain tape to create pleats.
Tip: Always iron your fabric before cutting it. This will ensure that any wrinkles or creases are removed, giving you a smooth surface to work with.
Step 4: Create the Hem and Pleats
To create a professional finish, fold over the edges of your fabric to form a hem. Depending on your design, you can either have a single fold or a double fold. Press the edges to ensure they stay in place.
- Bottom Hem: Fold the fabric up by about 5cm and sew along the edge to create a neat finish.
- Side Hems: Fold each side over by 1.5cm to 2cm and sew the edges.
- Pleating the Top: Use curtain tape to create pleats or, if you prefer, sew your pleats by hand for a custom touch.
Tip: Iron the pleats in place before sewing them down to ensure they look neat and even.
Step 5: Attach the Curtain Hooks or Rings
If you’re using curtain hooks or rings, sew them along the top edge of the curtains. You can also add a pocket for a curtain rod if that’s your preferred method. Make sure your hooks or rings are evenly spaced for a professional look.
Step 6: Hang the Curtains
Once your curtains are finished, it’s time to hang them up. Use a sturdy curtain rod that suits the weight of your fabric, and install the brackets securely. Carefully thread the curtain onto the rod and adjust the folds and pleats for evenness.
Tip: Make sure the curtains hang evenly and adjust the length if needed. Use weights or a curtain chain at the bottom if the fabric tends to float or shift.
Frequently Asked Questions (FAQs)
1. How long should curtains be?
Curtains should be long enough to cover the window, but the exact length depends on your style preferences. For a tailored look, curtains should just touch the floor, while a more relaxed look may involve them pooling slightly.
2. What fabric is best for making curtains?
The best fabric for curtains depends on the room and its function. Light fabrics like cotton and linen are great for living rooms and bedrooms, while heavier fabrics like velvet or blackout fabric are ideal for providing insulation and light-blocking in more formal settings.
3. How do you make custom curtains?
Making custom curtains involves measuring your window accurately, choosing your fabric, cutting the fabric to the desired length, creating hems and pleats, and attaching hooks or rings. Custom curtains allow you to select your desired fabric and ensure the perfect fit for your space.
4. Are custom-made curtains worth it?
Custom-made curtains are worth the investment if you’re looking for a perfect fit, unique fabric, and the ability to match your exact preferences in style and colour. They provide greater flexibility and a higher level of quality compared to ready-made curtains.
Conclusion
Creating your own curtains can be an enjoyable and rewarding project. By following the steps outlined in this guide, you can make custom-made curtains that perfectly fit your windows and add a stylish, personal touch to your home. Whether you opt for simple, elegant drapes or something more elaborate with pleats and details, your custom curtains will enhance your space while saving you money. With the right materials, patience, and attention to detail, your home will be transformed with beautiful, hand-crafted curtains.